
Abstract

In Part I of this article in the August 2018 issue of American String Teacher, we began discussing reciprocal exercises for the right hand that could be used when switching between the violin and viola. The violinist’s point of view was taken first, and several exercises were suggested to help develop what should be the violist’s chief concern: producing a beautifully round tone. Among these exercises were those for managing bow speed, pressure, and placement—all of which are different on both instruments and of crucial importance in the development of tone. We then progressed to exercises focusing on the height of the right elbow, tilt of the bow, and elementary string crossing. Having dealt with these right-hand issues from the perspective of a violinist playing the viola, we will then in Part II take up the opposite point of view and consider left-hand issues from the perspective of a violist on the violin.
A Violist on the Violin
The major technical issues a violist will face when playing the violin are ones concerning the left hand. These issues are directly related to the smaller size of the violin, which affects the shape, angle, and position of the entire left arm, wrist, and fingers (as seen in Figure 1). Because of this, a violist can be easily overcome with anxiety and grief at the mere suggestion they pick up a violin. This, however, need not be the case. The following exercises are concerned with ironing out some of these difficulties in the left-hand technique. We first look at the application and adjustment of finger pressure on the violin, then an exercise addressing the different distances between the fingers encountered on that instrument. These are followed by two shifting exercises that develop the hand frame, consistent intonation, and the judgment of distances in shifting. We conclude our discussion with a simple exercise for practicing vibrato at varying widths and speeds. 1 As in Part I, each section of text is accompanied by a summary table (Tables 1–4), which will present the technical issues for the left hand and tools needed for each exercise.
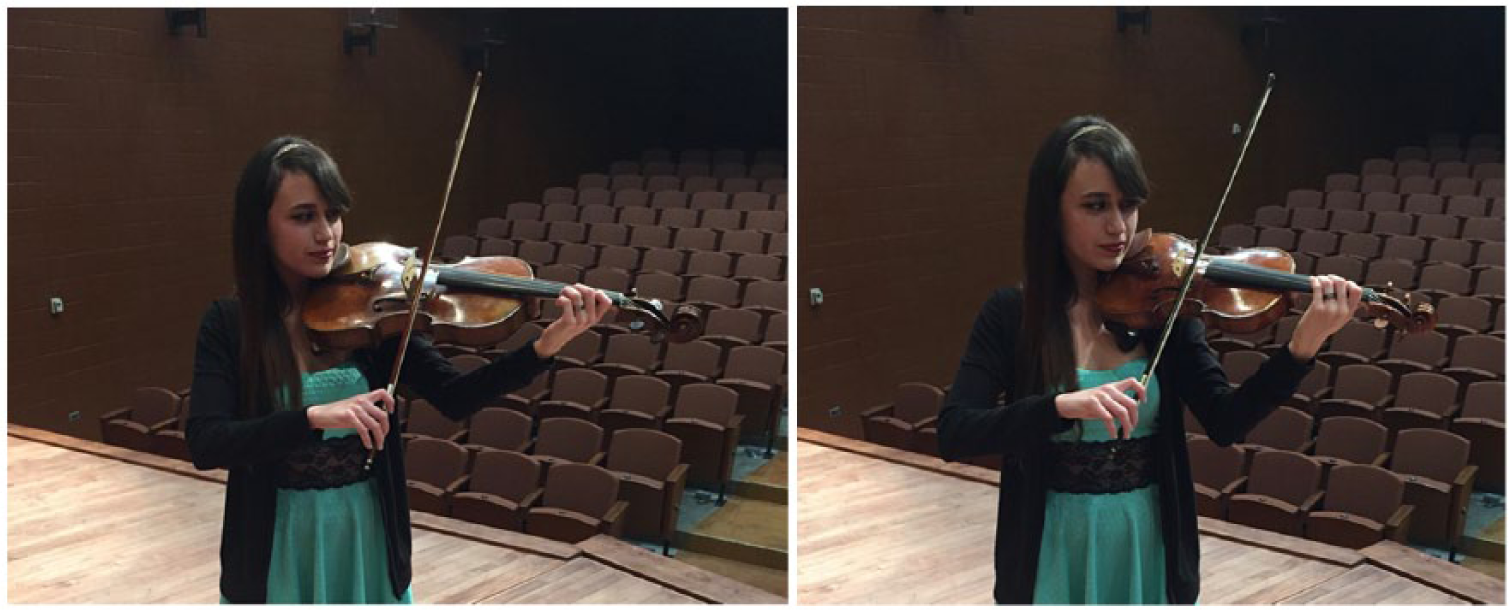
Playing position, viola versus violin.
Finger Pressure.

Fingerboard Mapping.

Shifting.

Vibrato.

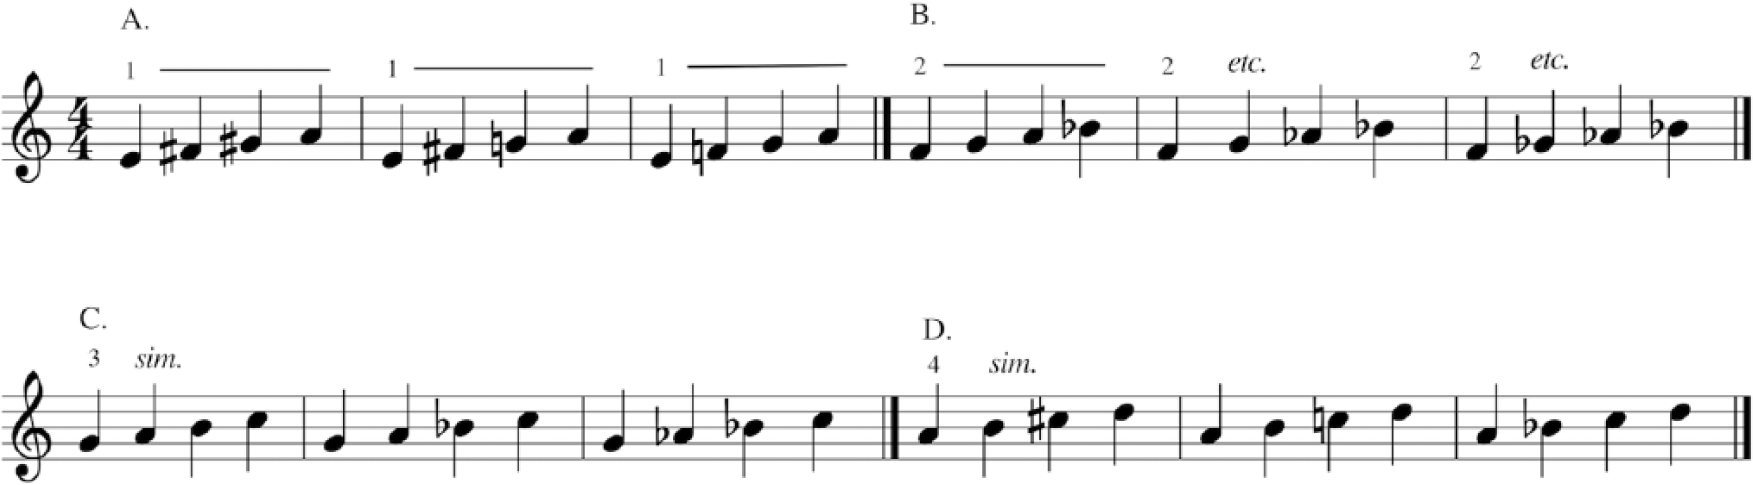
Finger Pressure
Just as there is more effort (weight) needed in the bow arm when switching from the violin to the viola, there is conversely less effort (pressure) needed in the left hand when going from the viola to the violin. Excess pressure in the left-hand fingers can have a detrimental effect on a player’s intonation and the freedom of their movements. In his treatise Basics, Simon Fischer states that, “The right amount of finger pressure is the same everywhere on the fingerboard: as much as necessary but as little as possible” (Fischer 1997, 104). This is the golden rule when dealing with finger pressure. But being able to properly gauge the right amount of pressure and adhere to this principle is a difficult task requiring the development of acute tactile awareness. Those who can readily respond to the left-hand pressure requirements of both the violin and viola will greatly improve their range of motion on each and find switching between them much easier. This freedom of movement will increase ease of play and have obvious implications for the shifting and vibrato exercises presented thereafter. 2
Figure 2 deals with the application of finger pressure in the left hand. There are three steps that are subdivided into several segments. In each step, the diamond note head signifies the natural harmonic, which resides under the third and fourth fingers in first position (i.e., the G and A natural found in the first position of the D-string). Each individual measure in step 1, or two-measure unit in step 2, should be repeated as needed. A single slur should always be used across the entire measure, alternating between down and up bows after the repeat. This is to ensure that the player focuses only on left-hand finger pressure and its adjustment, not on coordination with the right hand. All steps and segments should be worked on in the first or third positions as directed. They can and should be transposed to all four strings. The accelerating rhythm in each new segment adds difficulty to the exercise as it progresses.
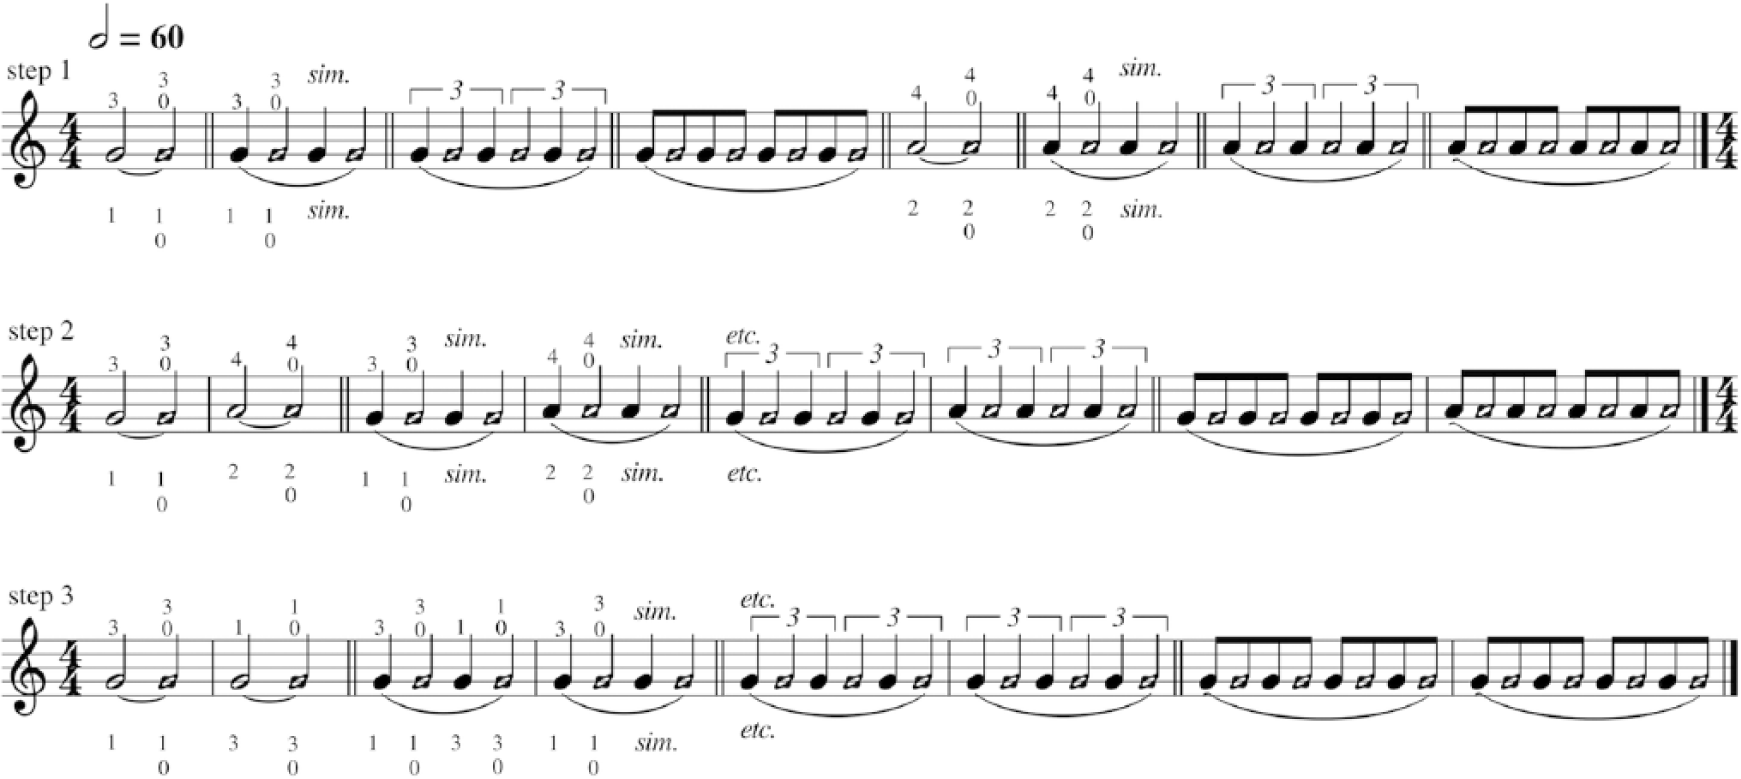
Exercise for adjusting left-hand finger pressure.
In step 1, each segment deals with the fingers individually, focusing on the application and release of pressure from the string. Each segment begins with a fully stopped note, which is then released to the natural harmonic residing under the same finger in a relaxed fashion. Step 2 follows the same lines as step 1, but it further complicates things by requiring each segment to be played with multiple fingers. By using different fingers in succession, the player is made to focus on the balance of the hand in coordination with the even application and release of finger pressure as practiced in step 1. Step 3 adds additional difficulties as not only are different fingers used within each segment, but shifting is also involved. In this more advanced version of the exercise, the shifting motion should be smooth and relaxed, with care being taken to glide the new finger up to the stopped note while making the necessary adjustments in pressure. This step should also be practiced with the second and fourth fingers, in the same manner as before. At all times, close attention should be paid not only to the full application and release of pressure but also to the subtle gradients in between. This will help the player determine exactly how much pressure is needed to stop the string sufficiently while teaching them how to release and apply it at will. In doing so, they can be sure to follow Fischer’s rule for finger pressure: as much as necessary but as little as possible.
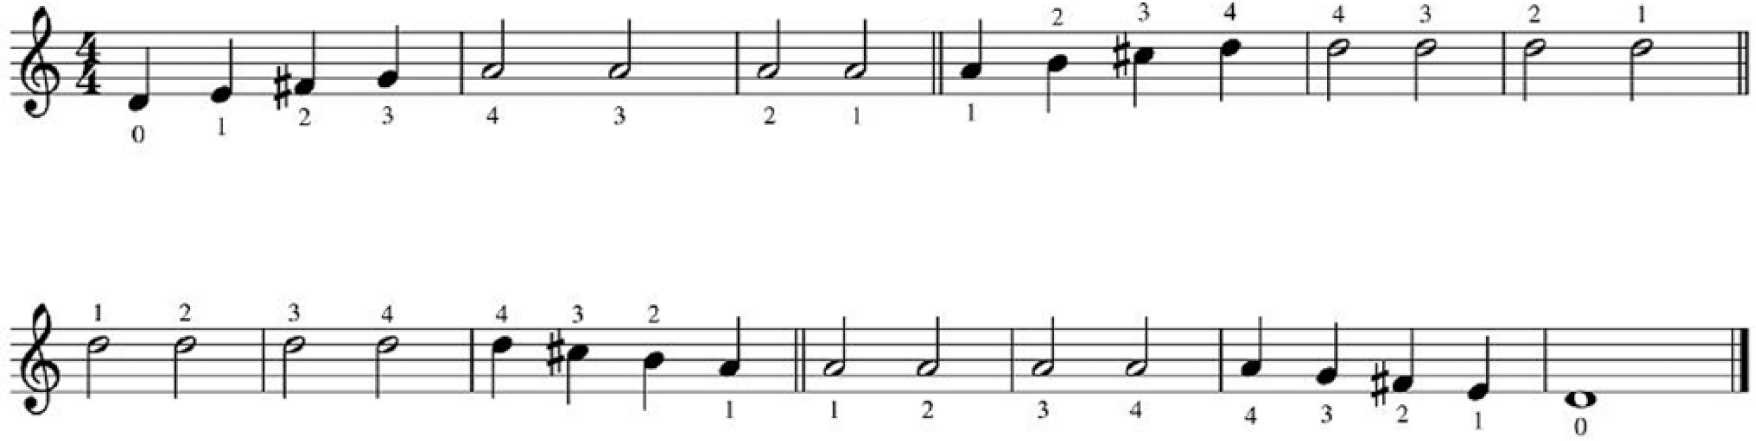
Fingerboard Mapping
When switching from the viola to violin, one of the obvious issues faced is the different distances between the notes. Owing to the viola’s longer fingerboard as well as its larger size, a violist might find that the smaller dimensions of the violin make it more difficult to control intonation. Ivan Galamian says of intonation that, “The building of good intonation rests mainly on the sense of touch in combination with the guidance of the ear” (Galamian 1985, 19). The note-spacing exercises of Figures 3 and 4 develop both the tactile and aural senses needed for building good intonation, and will, therefore, be quite handy for violists who find themselves playing the violin.

Exercise for fingerboard mapping, note spacing.

Descending exercise for fingerboard mapping, note spacing.
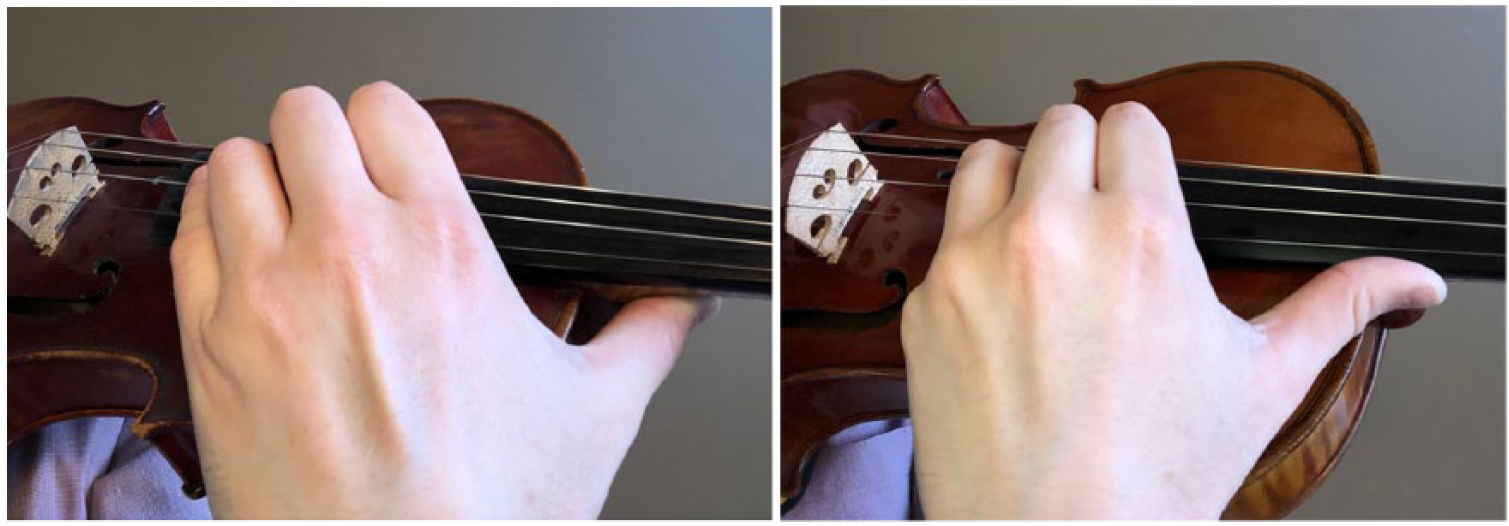
The exercise in Figure 3 involves the three most common finger patterns that we encounter as upper string players, with half-steps occurring between consecutive fingers (3–4, 2–3, and 1–2), as shown in Figure 5. When practicing this exercise in its most basic form, the player should focus on the different distances between whole-steps and half-steps on the violin and viola. Once the first position patterns are mastered, this simple ascending exercise can and should be transposed to other positions and strings. Although the exercise is notated with ascending patterns in the left hand, it should be practiced with all possible combinations of the four notes. For example, there are many possible combinations of patterns in the first measure alone (1234, 1243, 1324, 1342, 1423, 1432, etc.). For variety, we suggest that the finger patterns also be practiced with the following note values: whole, half, quarter, eighth, and so on.
Basic finger patterns.
In Figure 4, we focus on descending patterns, while continually checking fourth-finger intonation with the open string above. The first segment of this exercise is designed to set the hand frame, which should remain constant through the remainder of the example. While working on these descending intervals, the fourth finger should always remain balanced and curved. The recurrence of the fourth finger in combination with an open string will help in checking the accuracy and balance of intonation. Similar to the previous example, this exercise should be practiced with different note values and with different combinations of strings as well (G–D, D–A, A–E).
Shifting
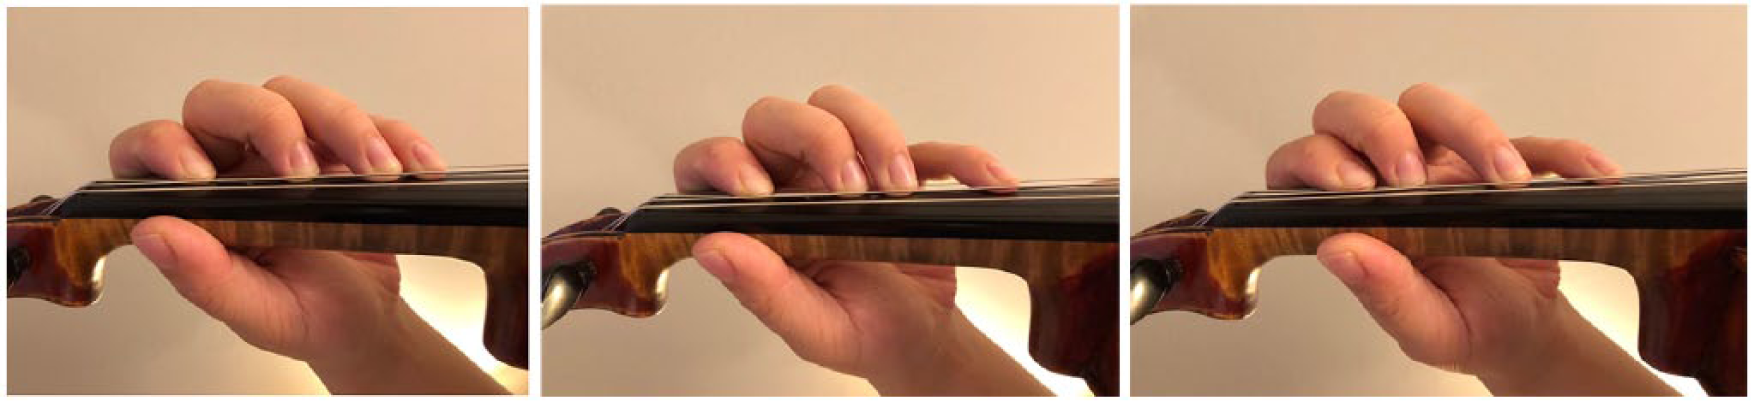
Our discussion of fingerboard mapping within one position naturally segues into the issue of shifting, which in essence is the mapping of the fingerboard as a whole. Passagework that includes a large amount of shifting at fast speeds and over great distances is far more prevalent in violin music than in that for the viola, several advanced viola concertos excepted. In truth, the shift is executed on the viola very differently from the violin, and the difference occurs when transitioning through the third, fourth, and fifth positions to higher ones. The reason there are different mechanics involved when shifting on both instruments is again due to their respective size and shape. The larger body of the viola (with its tall ribs and wide shoulders) causes the player to move their left arm a greater distance around the body of the instrument when transitioning to higher positions so that they may steer clear of it and retain freedom of motion. 3 As seen in Figure 6, sometimes this requires moving the thumb alongside the fingerboard in a way that is unnecessary for most players on the violin. For these reasons, it is important that violists who find themselves with a violin in hand practice shifting exercises regularly so that they can negotiate the more acrobatic demands of that instrument.
Shifting, hand and thumb position on violin versus viola.
Shifting is defined by Ivan Galamian as “. . . an action of the entire arm and hand, including all of the fingers and the thumb” (Galamian 1985, 24). Successful shifting then depends largely on the maintenance of the hand’s form, which can be described simply as the hand frame. The integrity of the hand frame is best maintained by keeping the fingers, hand, and wrist “quiet” and eliminating extra movements, which can complicate finger action and distract from the real job of the left hand: playing in tune. A shift is done simply by changing the angle created at the left elbow by the upper and lower parts of the arm. It should at no time be confused with or complicated by extensions of the finger or movements of the wrist, which are another matter entirely. The exercise in Figure 7 deals with shifting up to the fourth position while Figure 8 will focus on transitioning through the fourth position and beyond it.
One-finger shifting exercise with finger patterns.
Exercise on one string, replacement shifting.
In each segment (A–D) of the shifting exercise from Figure 7, the same finger should be used throughout, beginning with the first, then followed by the second, third, and fourth as directed. By focusing on the shifting action of one finger at a time, the player can pay more attention to how that finger releases from the old position and reapplies itself to the new one. They should not worry yet about the exchange of fingers, which would be the focus of a different variety of exercise. Again, they should be careful not to complicate the shifting movement with extra motions in the hand or wrist. Recalling earlier exercises, it is advisable that attention be paid to how much pressure is exerted by the finger on the string and thumb on the neck while shifting. 4 This exercise should be practiced slowly at first, with attention paid to the release of pressure from the fingertip before the shift begins, and the reapplication of that pressure when the new note and position is reached. Close watch should be given to each successive finger, especially the fourth. 5 Each segment should be applied in a similar fashion to all four strings and repeated as needed. This exercise can be made more challenging by incorporating slurs in groups of two or four notes. 6
The second shifting exercise in Figure 8 deals with replacement shifts, or in other words, the playing of the same note with different fingers in succession. The first segment ascends to the fourth position, in which maintaining a consistent hand frame is important. In the second segment, as the player moves beyond the fourth position, they should begin to move the thumb under the neck and the hand around the shoulders of the instrument. As in the previous shifting exercise, when performing the replacement shifts, the player must accurately gauge the release of pressure from the fingertip before the shift occurs. Because the player is now dealing with the exchange of fingers, the change in finger pressure before and after the shift must be balanced appropriately between the two that are being used. The best way to accomplish this is to perform the shift slowly so that the moment of exchange can be thoughtfully anticipated and carefully judged. Equally important for this exercise is the maintenance of consistent and accurate intonation. By making sure that the pitch remains the same regardless of which finger is being used, the player can be assured that their left hand is well balanced and that the hand frame is “quiet” and efficient. To make the exercise more challenging, slurs can be added, as well as dotted rhythms, which change the pace of the shifting motion.
To further build upon the shifting work done in the exercises of Figures 7 and 8, we recommend practicing scales and arpeggios up and down one string using the same finger, followed by scales with different combinations of fingers (1–2, 2–3, and 3–4). In this more advanced exercise, the player is dealing with the application and release of finger pressure and the movement of the left arm around the body of the instrument. As with many of the previous exercises, this can and should be practiced on different strings, with varying tempos, ascending and descending, and anywhere on the fingerboard. 7
Vibrato
We now come to a discussion of vibrato, a hotly debated topic and one of the most highly personalized aspects of string playing. Whatever a performer’s thoughts are on vibrato, it is integral to modern string performance, and its employment as an expressive tool is uncontested. In vibrato exercises, careful attention should always be paid to the width of the motion, which is generally speaking narrower on the violin than on the viola. While practicing wrist and arm vibrato, the finger itself should be passive and not attempt to initiate the vibrato motion, which is the job of either the wrist or arm alone (Galamian 1985, 39). An additional consideration should be made for what part of the finger pad is used on the violin as opposed to the viola. Violists tend to play on the pad or fleshy part of the finger while violinists play more on the tip. While it could be argued that this is more a result of the anatomy of the player rather than the instrument they play, Ivan Galamian suggests placing the finger while playing the violin “. . . a little to the left of the center of the fingertip (as seen from the player’s viewpoint)” (Galamian 1985, 17). Playing on the pads, or fleshy part of the finger, will produce a rich sound on the viola but create an ill-defined, muffled tone on the violin, something we should always try to avoid (Dalton 1988, 48–49).
“With a distinct approach to their secondary instrument, the player is better able to adjust to its subtle technical nuances and further explore its musical possibilities.”
The exercise in Figure 9 allows the player to practice different speeds of vibrato through accelerating rhythms, while working to adjust (or maintain) its width. It can be used to develop arm and wrist vibratos, as well as the ever illusive finger vibrato. This exercise uses a similar notation to the tone production exercises found in Part I of this article. The dash is used to signify the normal stance of both hand and finger on the written pitch. The downward arrow represents a “downward” motion of either the wrist, arm, or finger to a slightly lower pitch halfway through the metric value of the written note. It is suggested that this exercise be started with the second finger in third position. 8 Following this, other fingers should be used in a similar fashion, anywhere on the fingerboard.

Exercise for the adjustment of vibrato speed and width.
Conclusion
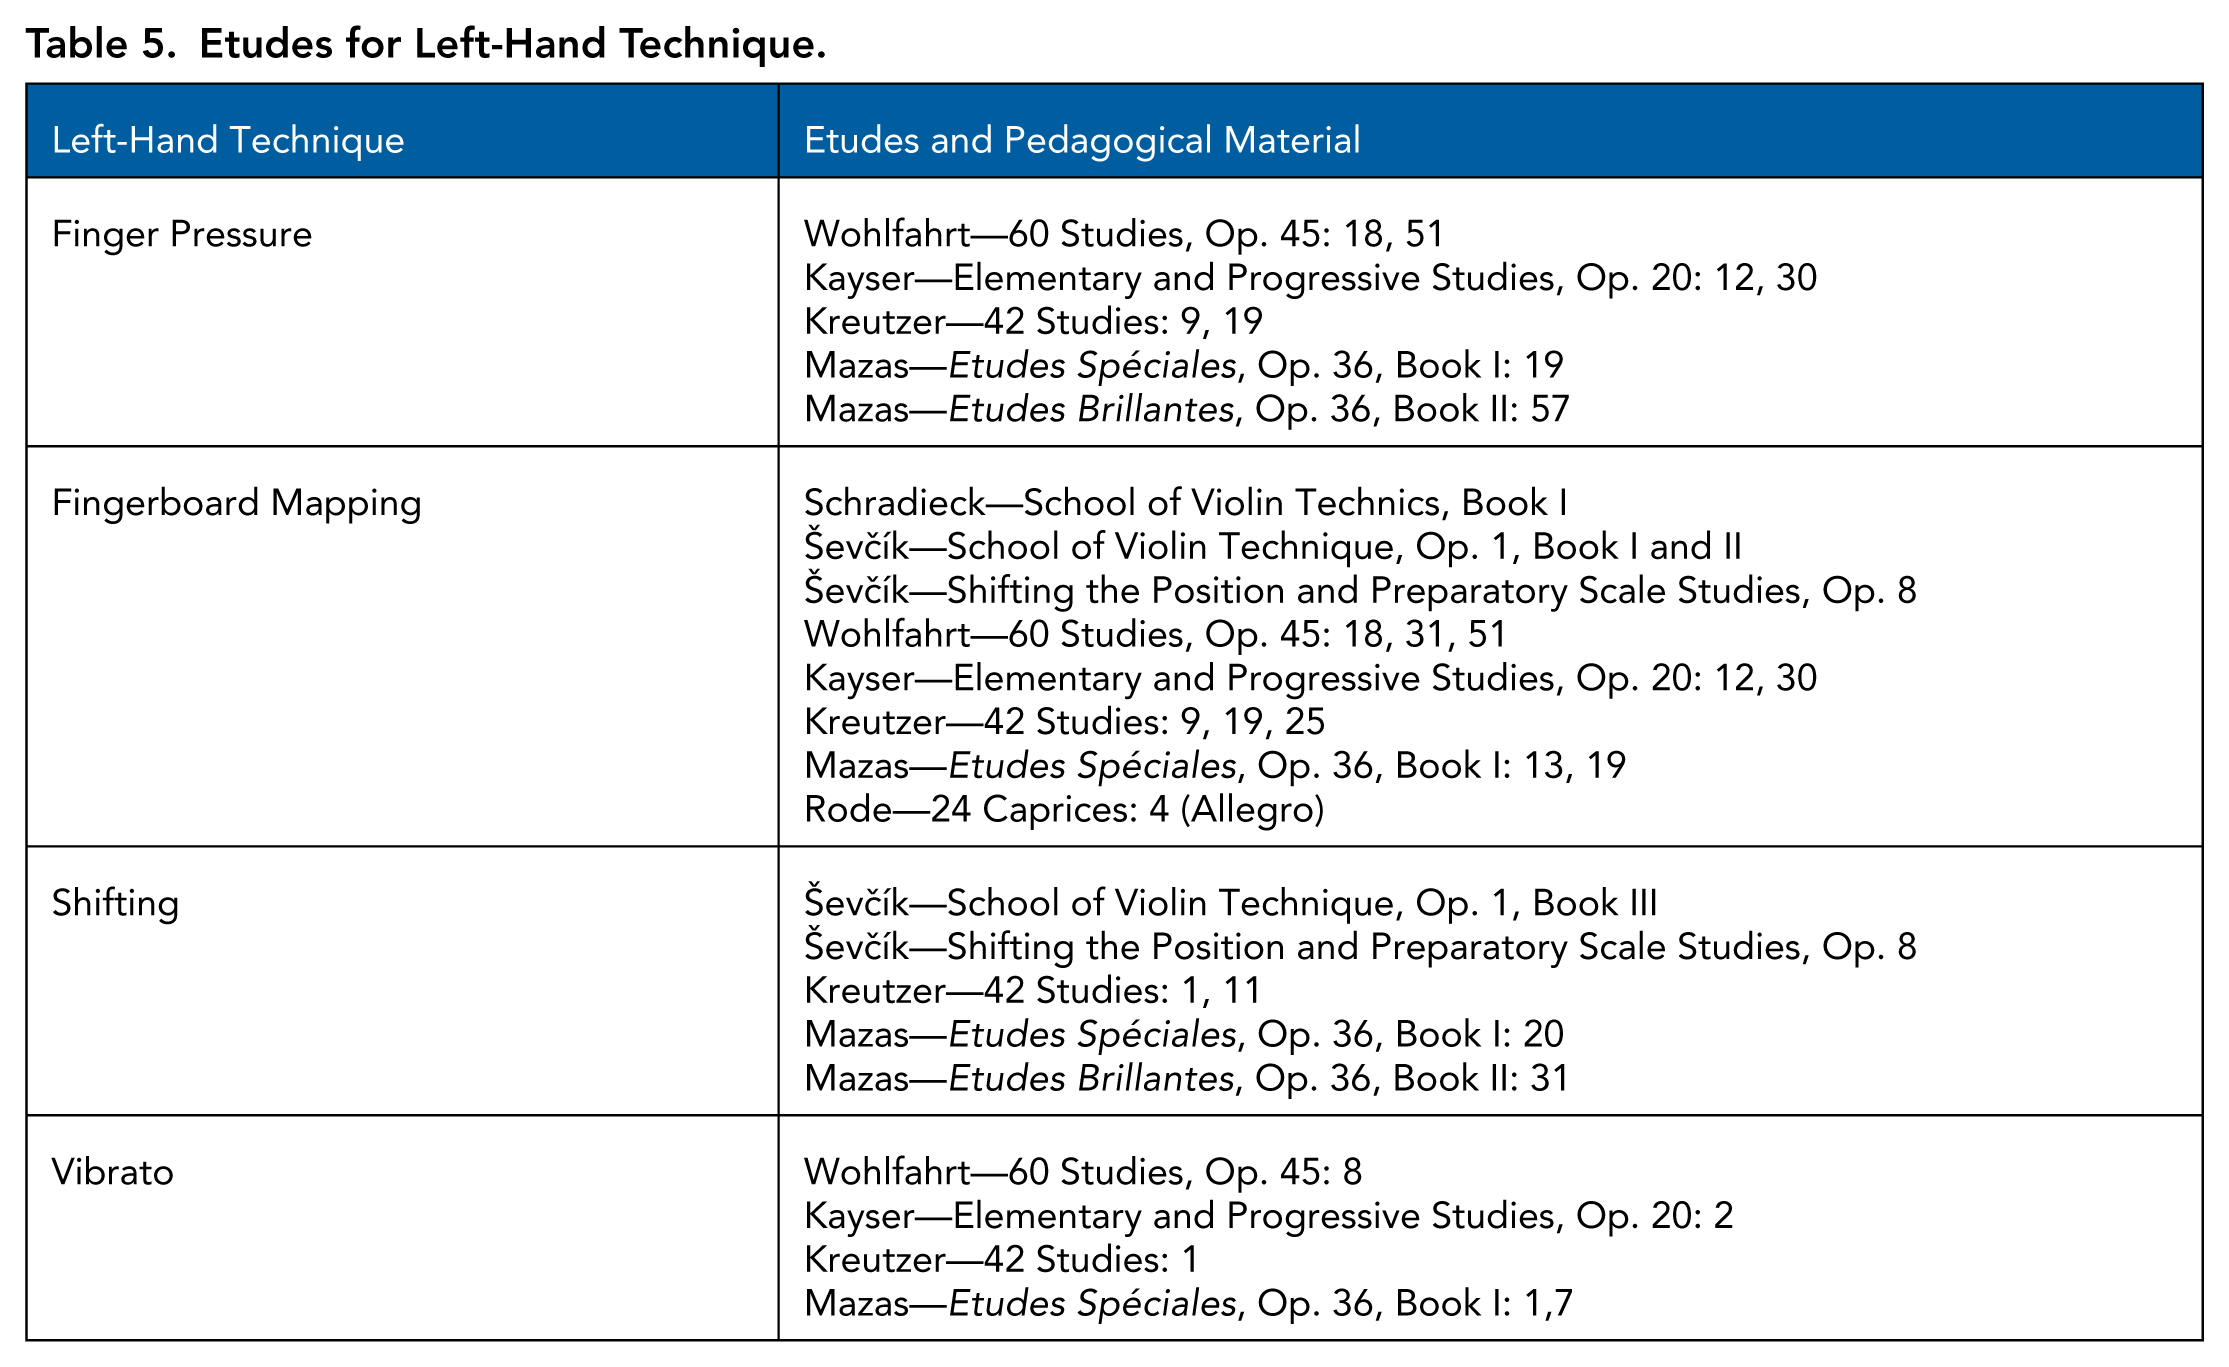
The exercises in Part II of this article focus on left-hand techniques that can be used by anyone needing to switch between the violin and viola but will be especially useful for a violist playing the violin. As discussed in Part I, the exercises will also prove effective for those wanting to add either the violin or viola as their secondary instrument. As noted in the conclusion to Part I, the most effective way of addressing more advanced techniques is through the study of etudes. Collections by Wohlfahrt, Kayser, Kreutzer, Mazas, and Rode are all playable on both the violin and viola and are a useful resource for further study. Table 5 lists various etudes from these collections, which build on the left-hand techniques discussed in Figures 2–4 and 7–9.
Etudes for Left-Hand Technique.
The goal of all exercises presented in this two-part article is to make the process of transitioning between the violin and viola a smooth and thoughtful one. With a distinct approach to their secondary instrument, the player is better able to adjust to its subtle technical nuances and further explore its musical possibilities. Switching between the violin and viola need not be difficult or something to avoid. It is our hope that any player wishing to develop the violin or viola as a secondary instrument can use these reciprocal exercises to do so, and after diligent study of them, comfortably teach and perform on both.
Footnotes
Notes
Kevin Nordstrom leads a busy career as violist, teacher, and scholar. He has given solo concerts and recitals throughout the United States, Canada, Europe, and China. As a dedicated educator, he has presented numerous lecture recitals for the College Music Society, as well as clinics for the Ohio and Texas Music Educators Associations. His analysis of Ligeti’s viola sonata was recently published in the Journal of the American Viola Society. He is currently on the string faculty at Wright State University and Earlham College, as well as the producer of The Great Composers Podcast.
Stephen Nordstrom is currently assistant professor of violin at the University of Texas at El Paso. He has been on the summer faculties of the renowned Interlochen Arts Camp in Michigan and Camp Encore/Coda in Maine, teaching violin and chamber music to young students from across the United States and the world. He has presented clinics for ASTA, as well as the Ohio and Texas Music Educators Associations, and has recently recorded a CD of new works for viola and piano with composer Dominic Dousa titled A Musical Portrait of the American Southwest.